Introduction
As a data hoarder myself I like to keep my data very safe, and for my MacBook Air that means Time Machine, an awesome piece of software similar to Timeshift on Linux (Which I have just found out it’s maintained by the Linux Mint Team :O).
There’s always the option of using an external drive, but that requires either having it plugged in all the time (or even worse, having to remember to do so) or having to put up with that Dongle-Life™ if you don’t have a USB-C one for the latest Macs.
Another benefit of using Samba for Time Machine is not having to use an entire drive for it, using Samba gives you the flexibility of directing the service to whatever directory you want. For example, you could use this in combination with a RAID set up with mdadm.
Creating the Samba share
DISCLAIMER: Functionality greatly varies between Samba and macOS versions, if you encounter any problems make sure to check the references and the troubleshooting section!
First of all we have install, setup and configure Samba to work with Time Machine
Installing Samba
For Debian based installs run: sudo apt install samba.
For Arch based installs run: sudo pacman -S samba
For Fedora based installs run: sudo dnf install samba
Configuring Samba
I found this resource by Canonical very useful, i suggest you read points 3 and 4 if you’re new to Samba.
If you haven’t already, create a samba user with sudo smbpasswd -a username
To the samba configuration file at /etc/samba/smb.conf add the following:
|
|
Restart the Samba service. For systemd systems, run: sudo systemctl restart smbd
Avahi service
In order for our Mac to automatically discover our server we need to install Avahi, also referred as Bonjour on macOS.
Installing the Avahi Daemon
For Debian based installs run: sudo apt install avahi-daemon.
For Arch based installs run: sudo pacman -S avahi
For Fedora based installs run: sudo dnf install avahi
Creating the service
Create a file at /etc/avahi/services/smb.conf with the following:
|
|
Restart the Avahi daemon. sudo systemctl restart avahi-daemon
If everything is correctly set up, our machines should be able to see eachother. We can check this by running on our Mac’s terminal: ping <serverhostname>.local
Configuring Time Machine
On your Mac, go to System Settings, Time Machine and add a new drive. There your share should appear as <HOSTNAME>.local, add it and log in with your user and password.
If once your first backup starts, the process gets stuck conneting with your server, stop and start the backup manually.
A <Mac-Hostname>.sparsebundle folder should appear in the share’s directory.
You have now successfully created a Time Machine-enabled Samba share! Thanks for reading. Make sure to check the rest of the article if you’d like :P
Troubleshooting
If after finishing the setup your Mac does not see your share on the Time Machine configuration screen follow these steps.
Check if the services are running correctly
Both sudo systemctl status smbd and sudo systemctl status avahi-daemon should say “running” (usually in green text).
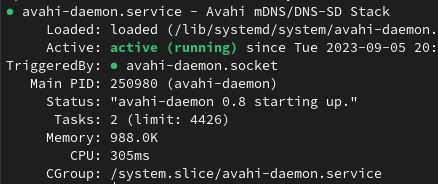
An example output of the Avahi service running:
-
If they are disabled or inactive you can fix it running
sudo systemctl enable <service>andsudo systemctl start <service>. -
If they have stopped due to an error, check the config files are in their place and have no errors.
Check for any misspellings in the config files
Make sure your config files are OK. Lines such as fruit:nfs_aces = no can be mistaken as a misspelling for ntfs_access.
References
I’ve used, and recommend checking out these resources: